Creating Bleeds
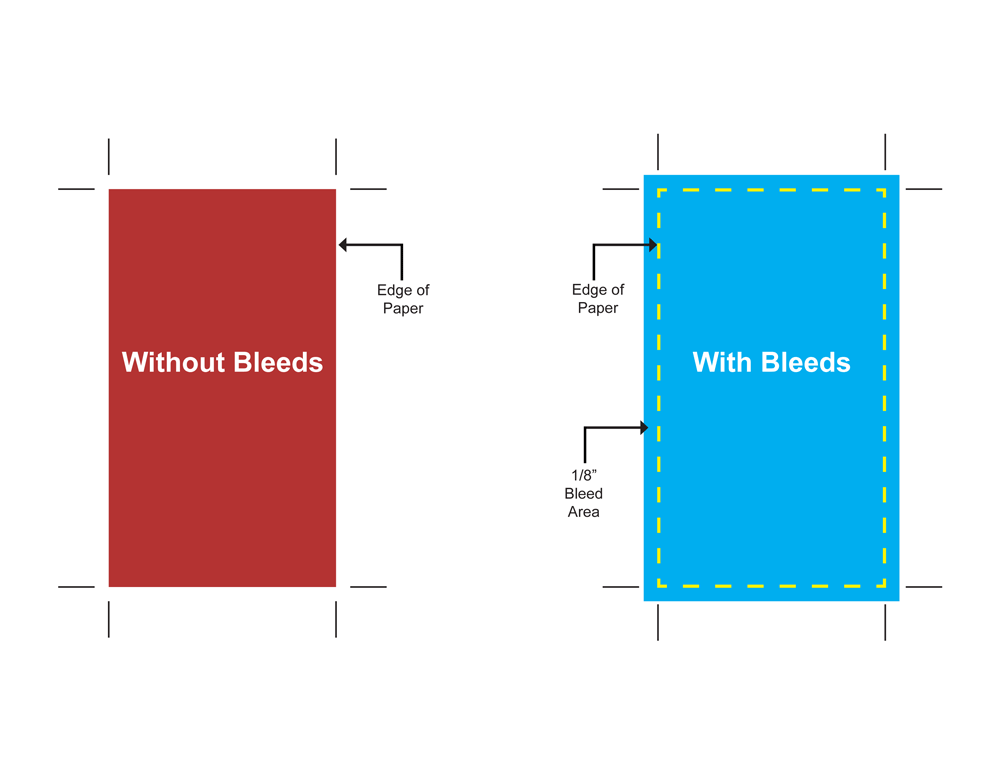
If you would like to have an image print to the edge of the paper, you will have to create bleeds. Bleeds are created when you extend your artwork 1/8″ past the edge of your paper. This extra 1/8 in. of paper will be cut off.
Bleeds are necessary because the cutting machines are not capable of cutting perfectly through a stack of paper from top to bottom. When you cut a stack of paper the cutter has about +/- 1/32″ of play in it. This means if you set up you design with artwork right to the edge and no extra, when you cut your stack of paper, you could end up with a small white edge on a good majority of your product.
Below are diagrams of designs without bleeds and with bleeds.
Note: Remember to add in a safe area around all cutting edges. The safe area is an area of 1/8″ (0.125″) inside the cut line where you don’t want any critical information or images. The reason for this is because the cutter can have minor variation, which may cut into your information. If you choose to make less than this clearance, we cannot be responsible for the items that may be cut off in this area.